I recently needed to move some large installer files onto a virtual machine on my Azure subscription. Rather than following the trend, I thought I would try of my own concepts and succeeded in finding a good technique.
Amongst the community at the moment, there are a number of different opinions and recommendations around how make large installers available to the virtual machines running on Azure. Here are some that I can remember:
- Share local drives using Remote Desktop Connection.
- Setup an FTP server on your virtual machine, then use an FTP client to upload the files.
- If these files are available on a website (such as Microsoft.com), then download the installer directly off the web onto the virtual machine (you may even choose to use SkyDrive).
Some of the disadvantages of the above approaches that I can see are:
- You may not get optimum transfer rates depending on the method of upload that you are using.
- For very large files, the virtual machine may encounter a networking issue that kills the download half way through.
- There is a dependency on your virtual machine running while you copy the files on to it. (This is my biggest issue with it as I’m using an A6 machine therefore each such transaction has a computation cost associated to it).
In order to get around the above limitations, I thought of uploading pre-populated VHD drives via PowerShell. To this:
1. Create a blank VHD file (you can also use an existing one if you already have it).
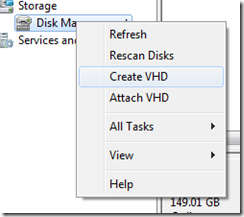
You can do this by navigating to Administrative Tools > Computer Management > Disk Management. Right click Create VHD and follow the instructions.

2. Once you have created the VHD, you can use the Attach VHD option and assign a drive letter for the VHD to appear in your list of drives in Windows Explorer.
3. You can then copy all of the files that you require to upload onto your virtual machine onto this drive. (Its a good idea to organise your files into structured folders rather than having a clutter of files in the root).
4. Upload the VHD file onto Azure using PowerShell.
You should read and follow the instructions at: http://www.windowsazure.com/en-us/documentation/articles/virtual-machines-create-upload-vhd-windows-server/
This will take you through how to upload a VHD file.
Here is a dump of my PowerShell code for this:
Import-Module azure

Get-AzurePublishSettingsFile

Import-AzurePublishSettingsFile "C:\credentials.publishsettings"

# This simply lists your Azure Subscriptions
Get-AzureSubscription

Set-AzureSubscription -SubscriptionName "[SUBSCRIPTIONNAME]" -CurrentStorageAccountname "[BLOBSTORAGEACCOUNTNNAMEYOUCREATED]" -CurrentStorageAccount [BLOBSTORAGEACCOUNTNAMEAGAIN]

Add-AzureVhd -Destination http://portal---------.blob.core.windows.net/MYCONTAINER/MYVHD.vhd -LocalFilePath C:\MYVHD.vhd
5. Attach the VHD to your virtual machine.
You should read the follow parts of the instructions here: http://www.windowsazure.com/en-us/documentation/articles/storage-windows-attach-disk/
Note that the ‘Attach’ option dynamically offers different options depending on whether or not you have a mountable VHD available on your storage or not.
Once you have attached the VHD to your virtual machine, you should be able to see the drive appear in Windows Explorer (on your virtual machine). Now you can interact with as if it is directly connected to your virtual machine.
Here are some of the advantages of using this approach:
- You don’t have to have your virtual machine turned on while you copy your data to the cloud. In my case, this saves me a lot of money. Particularly as I can leave for something to get uploaded by PowerShell overnight.
- Once you have uploaded this drive one time, you can attach and use it in multiple machines. Lets say you have 5 separate servers or development machines, you would only need to upload the VHD once. This will save you time and bandwidth. (You cannot currently attach one VHD to many virtual machines at the same time. You will need to detach the hard drive from the first virtual machine before attaching it to the next).
- You can always download the VHD again via PowerShell if you want to stop paying for the storage space (used by the VHD). You can also add more installers to it (you can also add contents to it directly from the virtual machine, then download the VHD with content already on there).
The only thing you should be aware of is that you will be paying for the disk space that this VHD uses on Azure. If you get too adventurous, you could run up a bill. I use it for a 20gb drive, which does not cost much monthly.
If you need a solution to be able to access the drive from many virtual machines at the same time, you could try mapping a network drive to one virtual machine that the VHD is attached to but I have not tried this.
Hope this helps.